
Recharging credit via WebPay
The WebPay payment gate enables customers to directly pay for their credit via a payment card or via a digital wallet.
Setting up WebPay
You need to have a WebPay account, get a public and a private key; the public key has to be uploaded to the WebPay server and the private one needs to be uploaded to MyQ. Also, you need to remember/copy the password of the private key. You can either use your own keys (for more information, check the WebPay documentation) or use the WebPay tools to create new ones.
MyQ needs the following data:
Merchant number: The Merchant number can be found on the WebPay portal, under Key management.
Private key: The private key can be generated on the WebPay portal, under Key Management. It can be in the .key, .pem or .crt format.
Private key password: The private key password is the password that is provided to WebPay during private key generation, or the passphrase used to create the private key manually.
Setting up the WebPay payment option on the MyQ Web Interface
Open the Credit settings tab (MyQ, Settings, Credit).
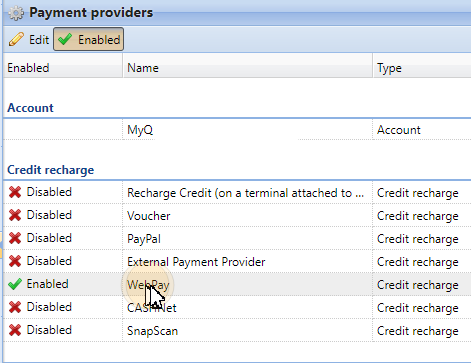
On the tab, under Payment providers, right-click the WebPay payment provider, and then click Edit on the shortcut menu. The WebPay properties panel opens on the right side of the tab.
The value of the Currency setting corresponds to the currency set on the General settings tab of the MyQ Web Interface.
Type the minimal amount that users will have to pay when they will buy credit.
Enter the Merchant number of the REST API app into the Merchant number text box and set the MODE to PRODUCTION.

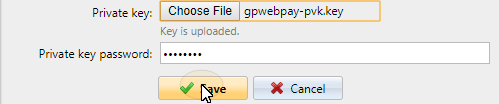
Upload the Private key from WebPay (click Choose File, select the file, and then click Open), enter the Private key password provided during generating of the private key, and then click Save.
Recharging credit via WebPay on the user's account on the MyQ Web Interface
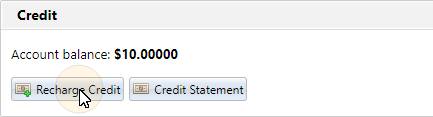
First of all, the user needs to log in to their account on the MyQ Web Interface. To recharge the credit there, the user has to click Recharge credit under Credit. The Recharge credit dialog appears.
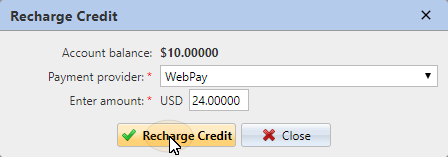
In the dialog box, the user has to select the WebPay payment provider, enter the amount of credit that they want to buy, and then click Recharge Credit.
A window with the WebPay payment options opens in the web browser; the rest of the steps correspond to the standard WebPay payment process.
After the payment is successfully sent to MyQ, the Payment successful dialog box appears
WebPay tries to connect to the MyQ server via the hostname or IP address that is set on the Network settings tab of the MyQ Web Interface. In case a hostname is set on the tab and paying users receive the "This site can’t be reached / XYZ’s server DNS address could not be found. / DNS_ PROBE_FINISHED_NXDOMAIN" message, try to replace the hostname with the IP address of your server.