
Automatic user registration
Usually, only registered users can access the MyQ system and use the services there.
However, in some exceptional cases, it might be useful to enable automatic registration and thus provide all users with access to MyQ. Users can be automatically registered to the MyQ system in two ways:
either they can register themselves on the MyQ Web User Interface or on an embedded terminal,
or they can be automatically registered after sending a job to MyQ from their computer or via email as an attachment.
On the Users settings tab, under New user registration, you can enable and disable these options, and for each option, you can select one or more groups where the registered users will be added to.
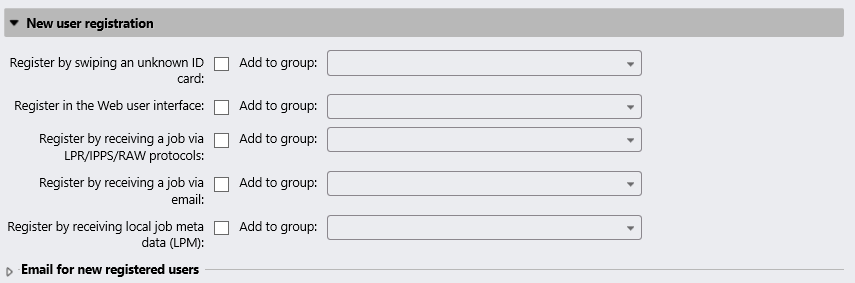
Register by swiping an unknown ID card
This feature is only compatible on Kyocera Terminals 7.5 and lower, Ricoh 6, and Samsung when using Print Server 8.2. For compatibility on other terminals please use Print Server 10.1+.
With this option selected, users can register themselves at a printing device with an embedded terminal by swiping an unknown ID card at the card reader.
After they swipe the card, a new account called anonymX (anonym1, anonym2, etc.) is created and they are automatically logged in to the terminal. There, they can edit the account using the Edit Account embedded action. If the Enable user profile editing option is enabled on the Users settings tab, under general, they can change their full name, email and language; otherwise they can only change the language.
Register on the MyQ Web User Interface
With this option selected, users can create accounts on the MyQ Web User Interface.
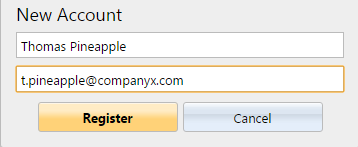
Click New Account at the bottom-left corner of the MyQ login window. The New Account registration widget opens.
Enter a name and email address.
Click Register. The newly created account is given the same name as the email address entered.
After creating the account, the New account created message box appears. After clicking Show PIN there, the user can see their user name and password.
The user receives an email with information about the new account. The default message contains their user name and PIN. You can change the message in the Email for new registered users section.
Register by receiving a job via LPR/IPPS/RAW protocol
With this option selected, users can register themselves by sending a print job from their computer via the LPR, IPPS or RAW protocol.
After a user sends the job, MyQ detects their name according to the currently set method of user detection, checks whether the user is already registered, and in case of an unknown sender user name, it creates a new account. The newly created account is given the same name as the job sender name detected this
way.
The user receives an email with information about the new account. The default message contains the user name and PIN. You can change the message in the Email for new registered users section.
Register by receiving a job via email
With this option selected, users can register themselves by sending an email with an attached printable document. For more information about sending print jobs via email, see Printing from email and from the MyQ Web UI.
The name of the newly created account is the email address that the email was sent from.
The user receives an email reply with information about the new account. The default message contains the user name and PIN. You can change the message in the Email for new registered users section.
Email for new registered users
Here you can change the email body that informs the new users about their account.
The values of the %pin%, %username% and the %realname% parameters are the user’s PIN, user name and real name.
By clicking Revert values, you can reset the email body to the default.