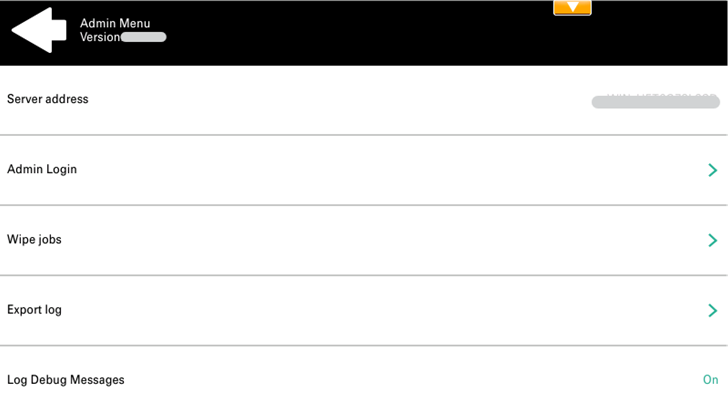
Admin Menu
From the terminal’s Admin Menu, you can administer the terminal and change its settings. The available actions are Admin Login, Wipe jobs, and Export log.
The Server address and Log Debug Messages options are not editable here. They are only available for checking. You can modify these settings during the terminal's remote installation in the MyQ Web administrator interface.
Entering the Admin menu
To access the admin menu, tap the MyQ logo in the upper-left corner of the panel and enter the administrator's PIN. The default admin PIN is 1087.
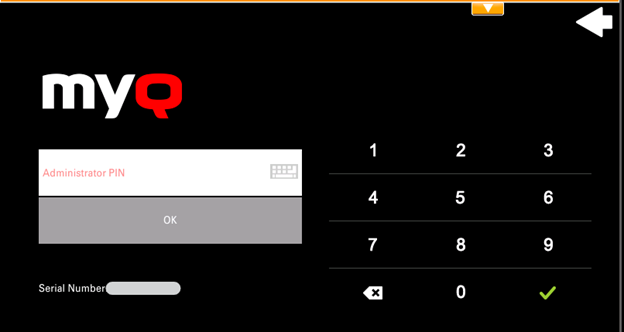
The device’s Serial Number is also displayed on this screen.
Admin Login
Unlocks the printing device panel; with the panel unlocked, the printing device's default screen opens, and all the device features are accessible. Pages printed and scanned in this mode are accounted to the *unauthenticated user.
Once the panel is unlocked, the device setup can be accessed by pressing the System menu button (or System menu/Counter button) on the device's operation panel.
When you open the device's panel using the Admin Login button, you are automatically granted administrative rights to all its settings.
By unlocking the panel, you can access the printing device's Application menu and uninstall the embedded terminal.
Hiding the native Copy and Scan buttons
After tapping Unlock Panel, press System menu (or System menu/Counter) to access Device Settings, where you can hide the native Copy and Scan (send) buttons that are present by default from the manufacturer in the upper-left corner on the terminal screen.
In Device Settings, go to Function Key Assignment and set all Keys to NONE (the first option on the list). (This applies to all Kyocera devices with a touchscreen (without a hardware keyboard)). Confirm by tapping Yes. The terminal is disabled, and the printing device's default screen opens.
Wiping Jobs
With the Local Print Spooling feature enabled, print jobs are sent directly to a printing device where they wait until they are released by the sending user or until they are deleted from the device.
To delete the print jobs, do the following:
On the Admin Menu home screen, tap Wipe jobs on the upper-right side. The following window opens:
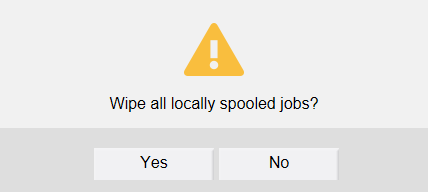
To delete the locally spooled jobs, tap Yes. The Admin Menu reopens.
Exporting the Log
If MyQ Support asks you to provide the embedded terminal's log, you can do so using a USB Flash drive.
To export the terminal log, insert the USB Flash drive on the device and tap Export log on the Admin Menu.
The log file is exported and uploaded to the USB.
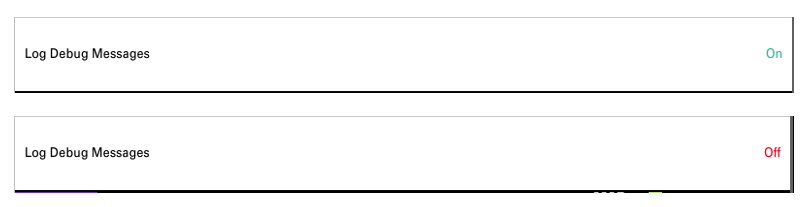
Log Debug Messages
Log Debug Messages is only information about which debug level is set on the device. If the setting is enabled, the terminal will generate additional log information for auditing and troubleshooting purposes.