
Setting up Scan to Me
The setup of the Scan to Me feature consists of the following consecutive steps:
Enable and set up scanning on the MyQ server.
Set SMTP on the printing device.
Set the destinations for the MyQ users on the MyQ server.
Enable and set up scanning on the MyQ server
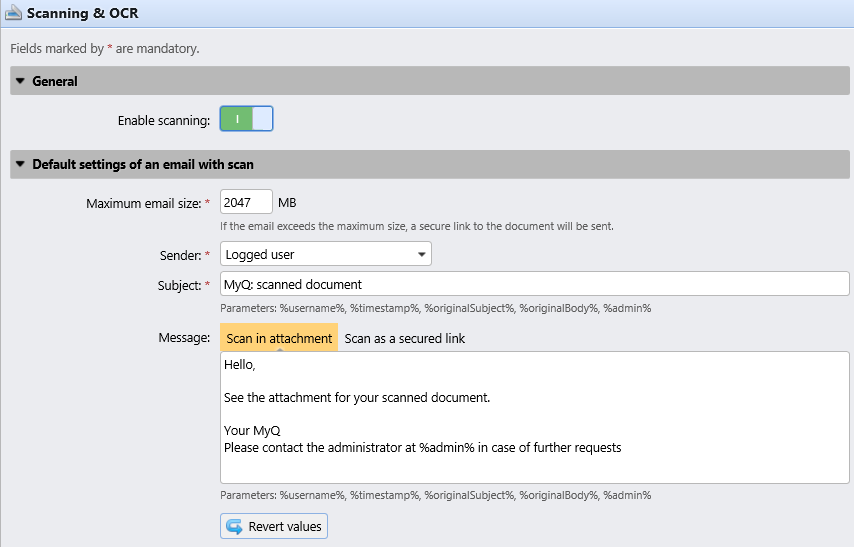
Enable scanning on the Scanning & OCR settings tab, under General.
You can also set the Maximum email size (in MB), and modify the Subject and Message of the email with the scanned document. As the Sender of the document, you can select either the email of the logged user or the default sender email set on the Network settings tab, under Outgoing SMTP server.
Set SMTP on the printing device
The scanning function requires enabling the SMTP protocol, setting the SMTP server address and entering a sender email on the printing device’s web interface. For information about how to enter the printing device web interface and find the particular settings, see the printing device’s manual.
To enable the scanning function, take the following steps in any order on the printing device’s web interface:
Enable SMTP protocol.
Enter the MyQ server IP address or host name.
Ensure that the SMTP port is the same as the SMTP port in the Network settings tab, under MyQ SMTP server. The default port in MyQ is 25.
Enter sender email address. The address value is arbitrary.
Set the destinations for the MyQ users on the MyQ server
On the properties panel of each individual MyQ user, you can set the destinations for the three options of the feature:
Sending scans to the user's primary email.
Sending scans to other predefined emails.
Storing scans to the user's scan folder.
To provide a user with these options, set the appropriate fields on their properties panel according to the following table:
Option | Parameter | Value |
|---|---|---|
Sending scans to the user's primary email | User's primary email address | |
Sending scans to other predefined emails | User’s scan storage | Any number of email addresses separated by commas (,) |
Storing scans to the user's scan folder | User’s scan storage | Folder where the document |
You can set the parameters when adding, importing or synchronizing the user and later change them in their account settings. For more information, see the MyQ Basic Installation Guide.