Once the ScannerVision server is installed, there are configuration steps to be done, both in MyQ and in ScannerVision.
Configuring ScannerVision
In order to set ScannerVision properly, you need to configure Network settings, Templates, Clients, and Users.
Network Settings
-
Open ScannerVision. Settings is shown by default.
-
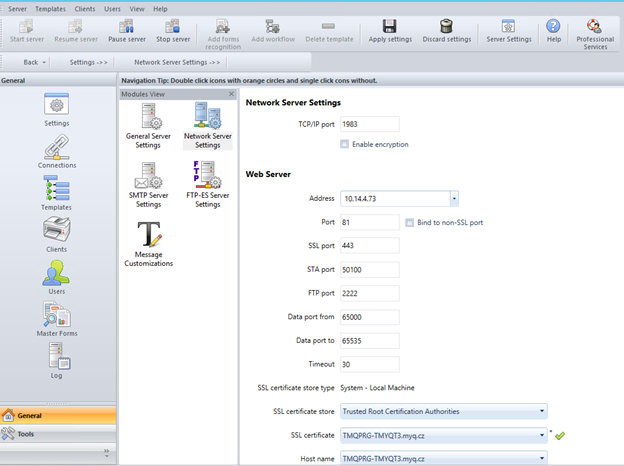
Click Network Server Settings in the Module View.
-
Add the IP address or hostname of the ScannerVision Web Server in the Address field.
-
Change the preset ports if necessary.
-
Enable/disable non SSL.
-
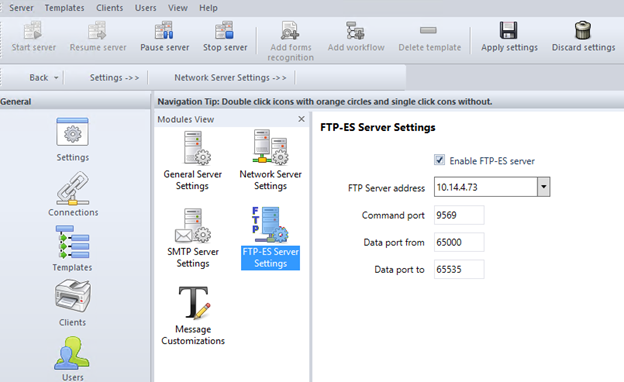
Configure the FTP-ES server settings:
-
Save your settings.
Templates Setup
Templates control what actions ScannerVision performs. They determine where documents come from, what processing is done on them and where they ultimately end up. Multiple templates can be defined and assigned to users and groups.
To add a new template:
-
Open ScannerVision Processing Engine and click Templates in the Navigation Pane.
-
Click Add Workflow on the top menu.
-
Name the new template and mark it as Enabled.
-
Click Apply Settings on the top menu.
-
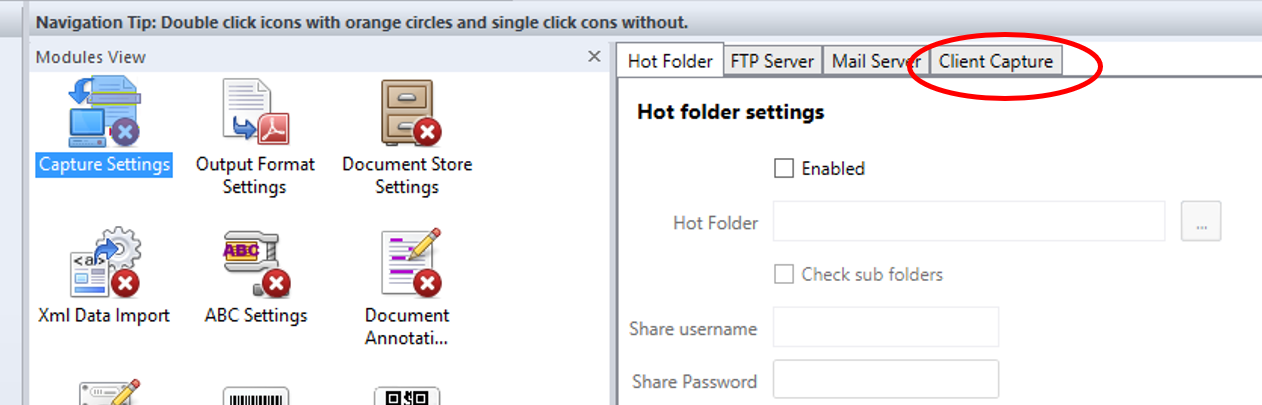
Once saved, double-click on the new template. In the right tab of the window, select Client Capture.
-
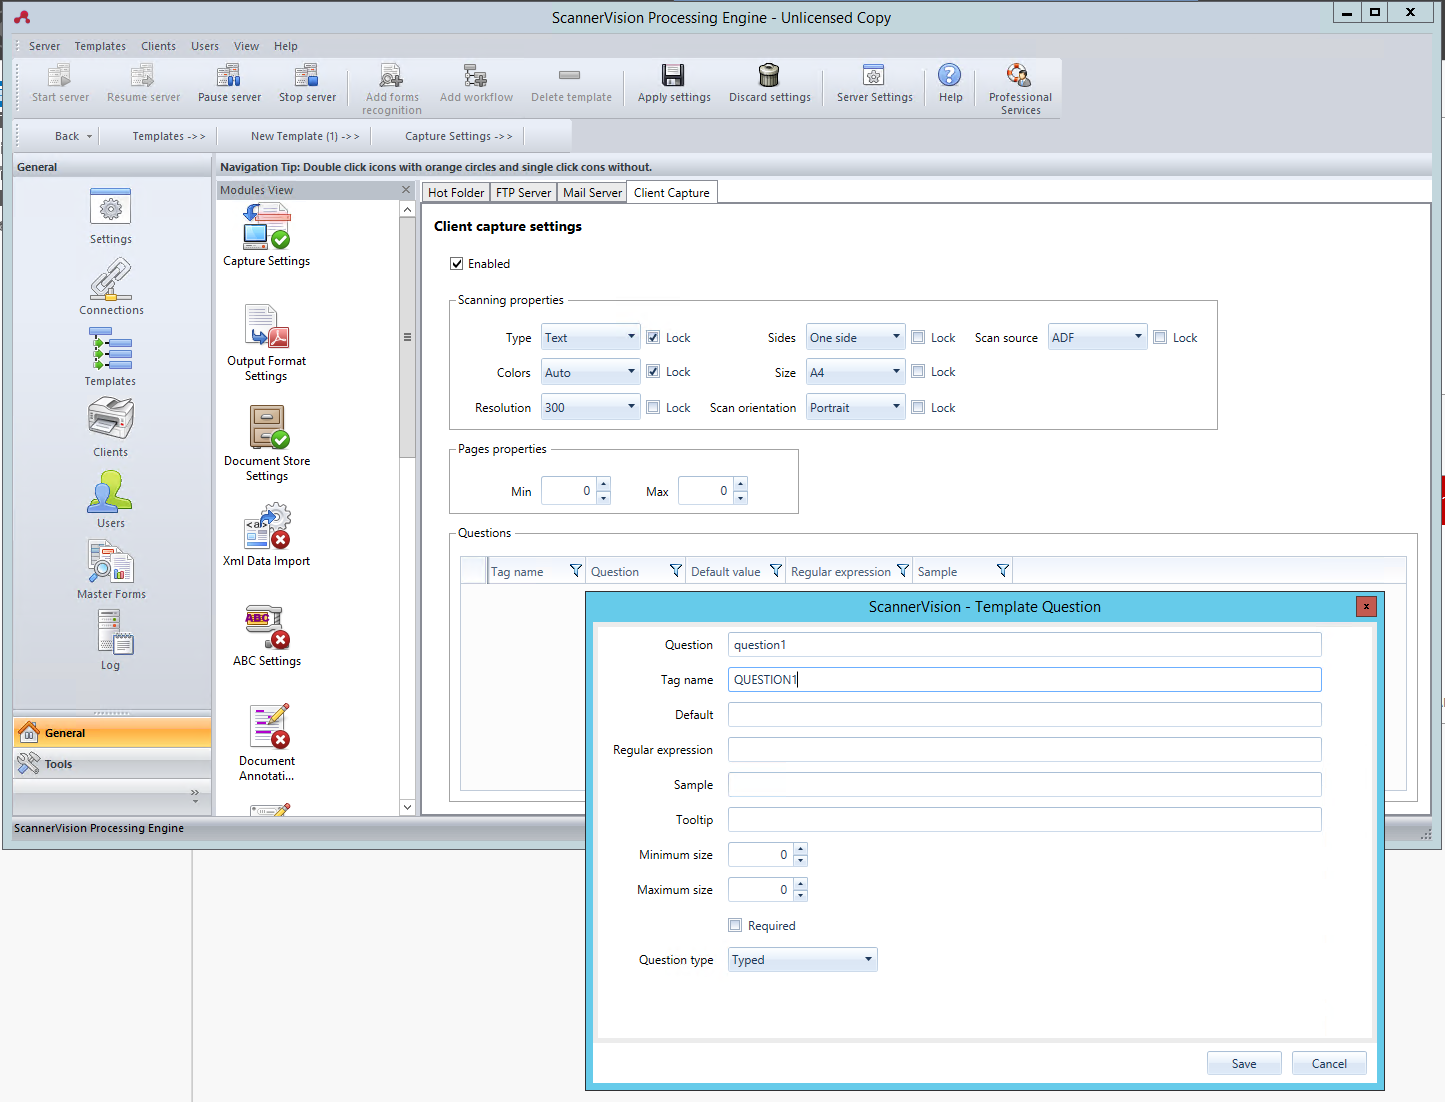
In the Client Capture tab, mark the Enabled checkbox. Now the template's settings are editable.
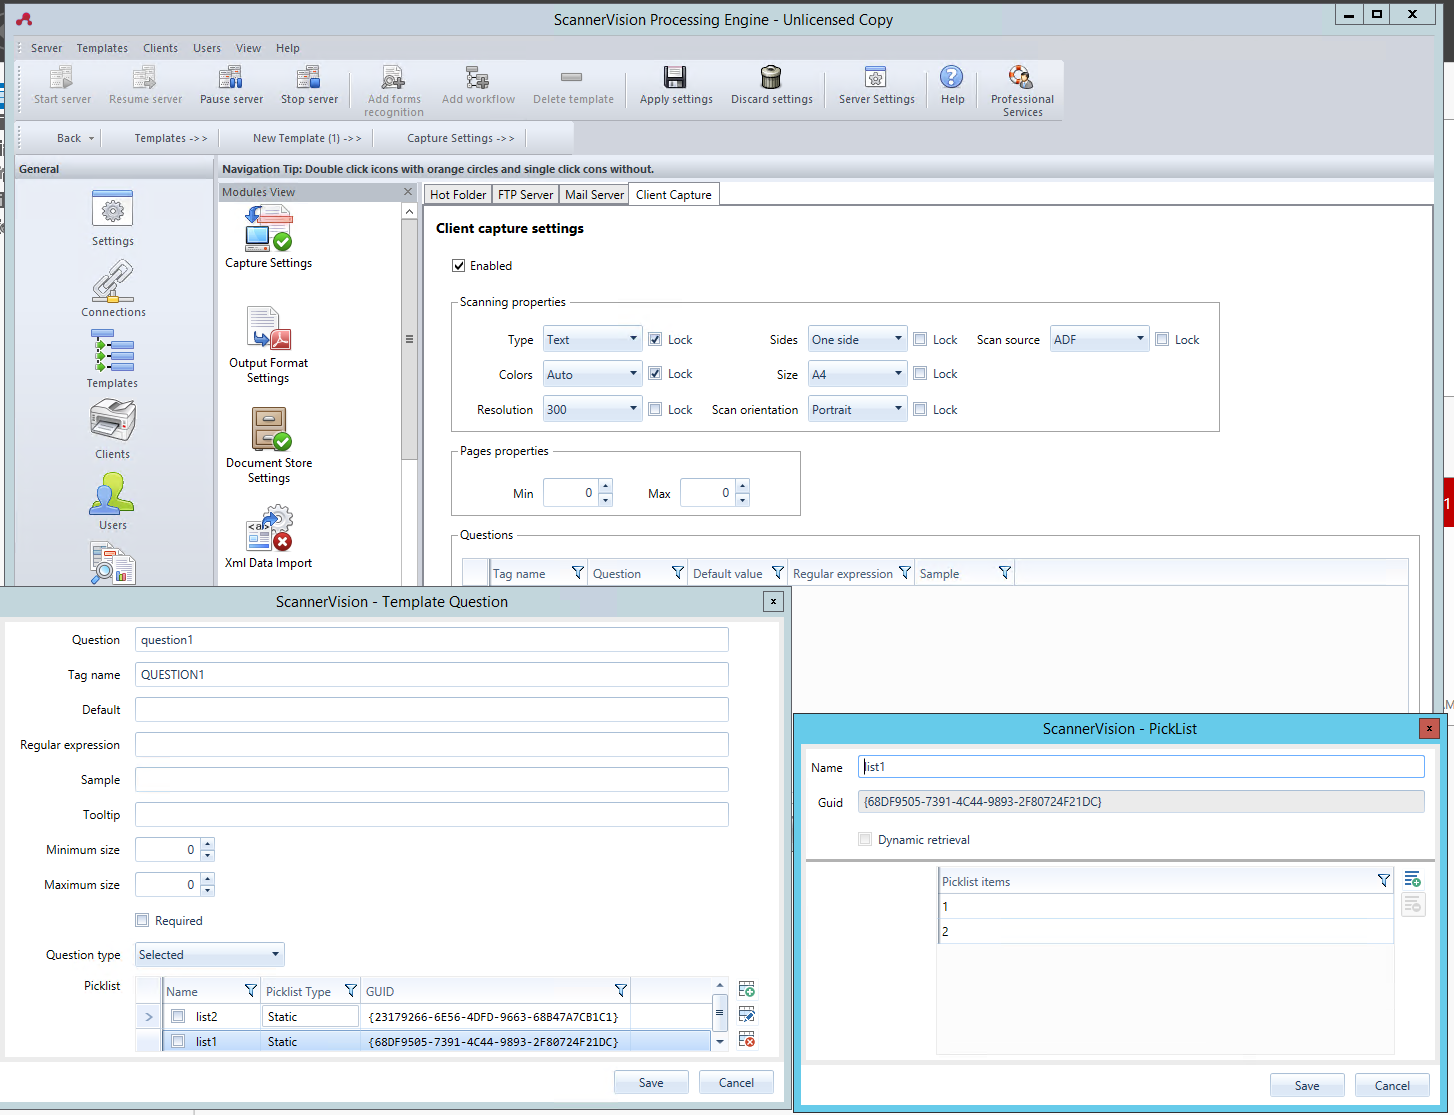
Adding Questions on a Template
Questions are used to capture necessary document information.
To add a new Question to a template, in the Client Capture tab:
-
Right click on the Questions area.
-
Select Add question.
-
In the new Template Question window, fill in the Question, Tag name, and Default text fields, and any other of the optional fields.
-
In Question Type select Typed.
-
Click Save.
Adding a Picklist to a Question
A Picklist can be added to a Question within a template, if the Question Type selected is Typed.
To add a Picklist:
-
Click on the Add Picklist button on the right.
-
Once there, select Static as the Picklist Type.
-
In the Picklist window, enter a Name for the picklist.
-
Add picklist items by pressing the plus (+) button on the right.
-
Click Save.
-
Once saved, select the picklist(s) to be displayed for this question, and click Save.
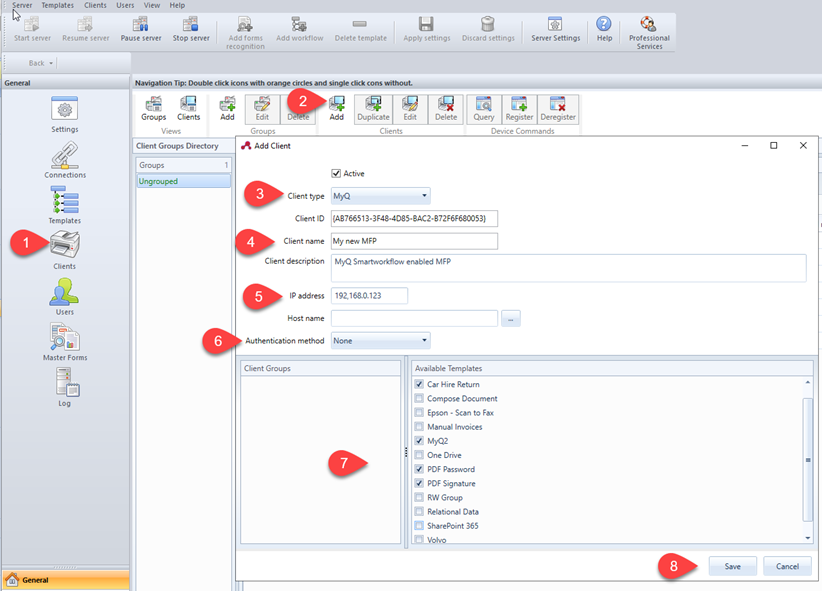
Configuring Clients
The clients you configure here represent the MyQ terminals connected to ScannerVision.
To add a client, go to ScannerVision Processing Engine and:
-
Click Client on the Navigation Pane.
-
Click Add under the Clients view.
-
Choose MyQ as the Client type.
-
Optionally add a Client name, and Client description.
-
Add the printing device's IP address (make sure to use the device's IP address and not the MyQ server one).
-
Choose an Authentication method from:
-
None - everyone can access the same templates.
-
ScannerVision - Used for Single Sign On; Users have customized template lists.
-
-
Choose the templates to be accessed by everyone, in case None was the authentication method of choice.
-
Click Save.
Configuring Users
Users can be imported from a Windows Server, LDAP, AD or they can be manually added. For further instructions, please check the ScannerVision User Manual.
Users also need to have templates assigned to them.
Whichever method is chosen, the users in ScannerVision have to match MyQ Users. To check and make necessary modifications, go to ScannerVision Processing Engine, click Users on the Navigation Pane and:
-
Make sure that the User name matches the MyQ user name (if users were manually added).
-
Make sure that the Email address matches the MyQ user's email address (if users were manually added).
-
Select templates for the user from the Available Templates.
-
Click Save.
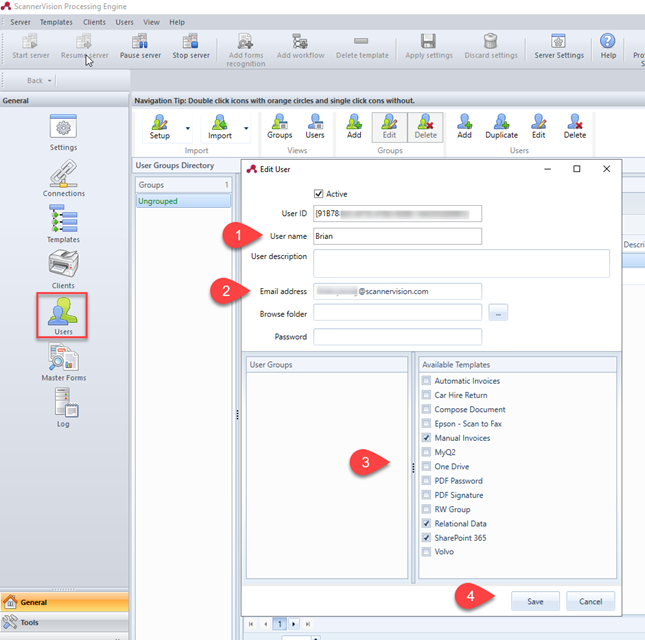
If users are imported, their properties such as names and email addresses will match, however Templates will still need to be assigned to them.