Editing terminal action nodes
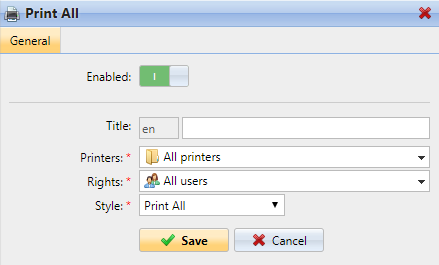
Each action can be edited on its properties panel. To access the panel, double-click the terminal action node on the list of nodes or on the terminal screen preview. On the properties panel, you can see up to three settings tabs (depending on the particular action): General, Destinations, and Parameters. The Destinations and the Parameters tabs are mostly used in Easy Scan action nodes and are described there.
General tab

Enabled - If you disable the node, it is not displayed on the terminal and cannot be used there.
Title - Here you can change the action node's name. If you do not change it, the default name is used. Depending on the number of additional languages set on the MyQ Web administrator interface, you can use different names in different languages. (The additional languages can be set on the MyQ General settings tab.)
Printers - Here you can select the printers the action node will be available on. All printers are assigned by default. To add more printers, select them from the Printers drop-down.
Rights - Here you can select the users or the groups of users that will be able to see the action node. Due to this setting, the layout and available features of the embedded terminal can vary depending on user's rights to particular nodes. By default, the right to see the node is given to all users. To provide an additional user or a group of users with rights to the action node, select the user or group from the Rights drop-down.
Style - Select the action node’s predefined style from the drop-down.
.png)