
Network Settings
On the Network settings tab, you can manage the network communication between the MyQ Central server and other parts of the MyQ solution. It is divided into the following sections: General, Security of communication Security, Outgoing SMTP server, HTTP Proxy server, and Firewall.
General
In this section, you can enter the hostname of the MyQ Central server. This hostname is used by external components of the MyQ system, such as the MyQ Replicator or Site servers, for communication with the MyQ Central server.
Security of communication
In this section, you can Enable only secure connection, and upload your security certificate.

To upload a certificate:
Click Change certificate. The Change Certificate dialog box appears.
In the respective column, click Choose files. The Open dialog box appears. You can select from the PEM format and the PFX (P12) format.
Browse and select the certificate that you want to upload, and then click OK.
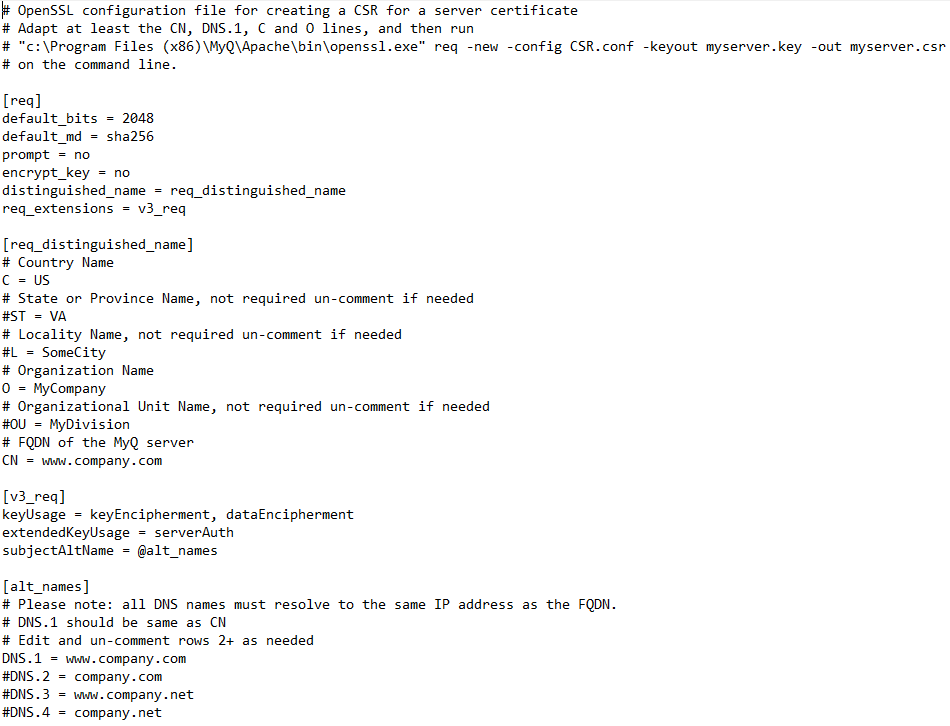
Click Generate Certificate to recover the default MyQ test certificate (MyQ.local). The files server.cer , server.key and server.pfx are stored in C:\ProgramData\MyQ Central Server\Cert.
Outgoing SMTP server
To send email reports, send error messages to users, send automatically generated PIN to users, and forward scanned documents, you have to configure the email server where all the emails are forwarded to.
To configure the server, do the following:
Select a Type from Classic SMTP Server or or SMTP Server with OAuth login.
For Classic SMTP Server:
Enter the server hostname or IP address in the Server text box. If the email server listens to other than the 25 TCP port, change the Port setting to the correct value.
Choose between the None, SSL and STARTTLS Security options.
Optionally choose to Validate certificate or not.
If credentials are required, enter the User and Password.
Enter the address that you want to be displayed as the Sender e-mail on PIN, alert and report messages.
After you enter the data, you can click Test to test the connection to the email server.
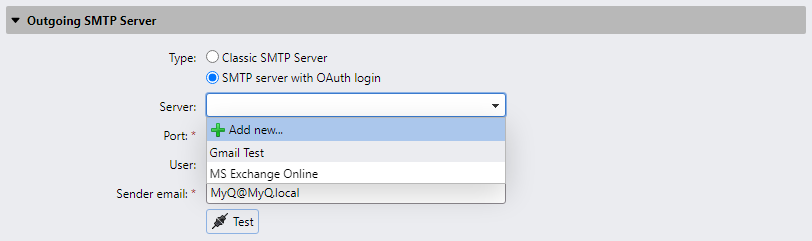
For SMTP Server with OAuth login:
If you have already set up a Microsoft Exchange Online server or a Gmail with OAuth2 server in the External Systems settings, those servers are available in the Server field drop-down. If not, you can click on the Server field and then click Add to add your Microsoft Exchange Online or Gmail server. For more information, check Microsoft Exchange Online Setup and Gmail with OAuth2 setup.
If the email server listens to other than the other than the 25 TCP port, change the Port setting to the correct value.
Security is STARTTLS by default and cannot be changed.
If credentials are required, enter the User.
Enter the address that you want to be displayed as the Sender email on PIN, alert and report messages.
After you enter the data, you can click Test to test the connection to the email server, and click Save to save your changes.
HTTP Proxy Server
In this section, you can set up a MyQ Proxy server which can be used for activating a license. Mandatory fields are Server (name) and Port. After changing ports, restart all MyQ services.
Firewall
In this section, you can automatically open all the ports on the Microsoft Windows Firewall that are necessary to run the MyQ application.